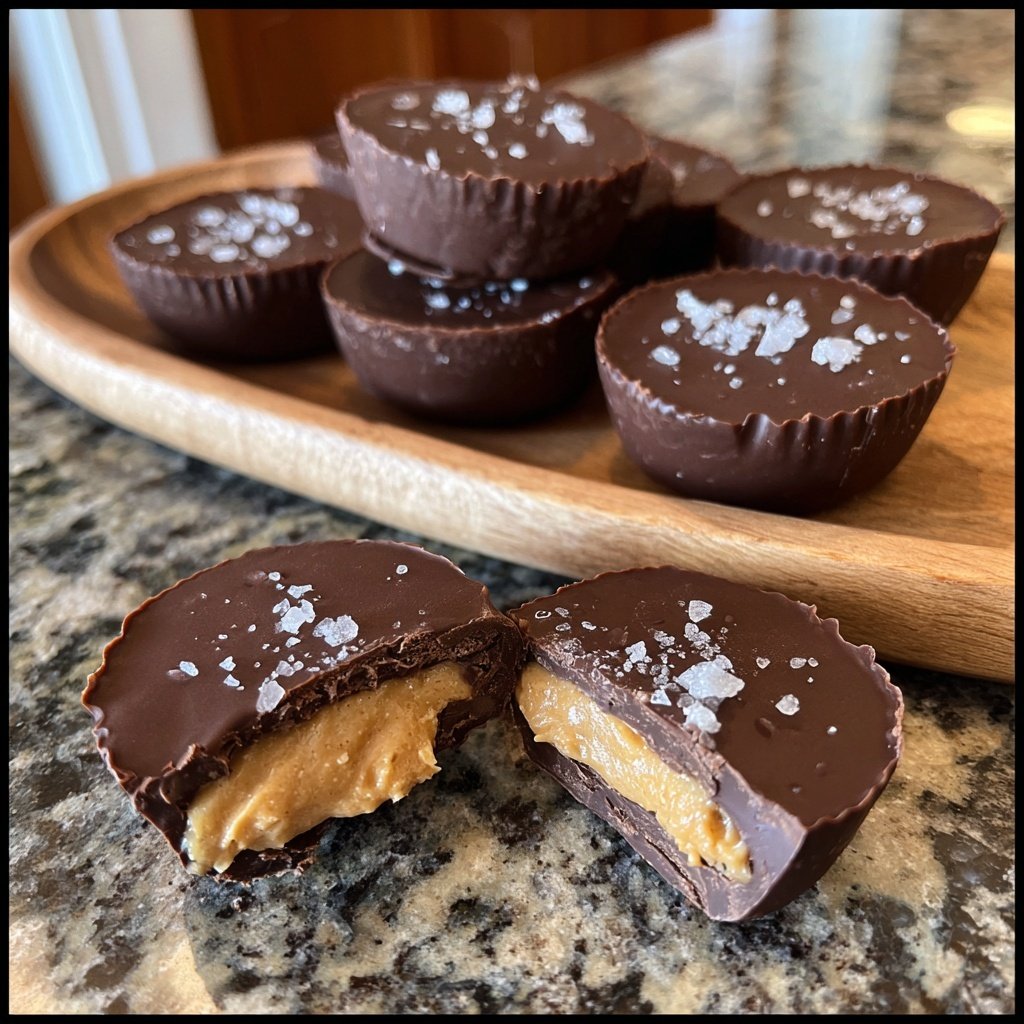
Homemade Reese’s Cups with Sea Salt
Uitgelicht onder: Zoete Baksels
I love making these Homemade Reese’s Cups with Sea Salt because they bring together the perfect balance of creamy peanut butter and rich chocolate. The added sea salt elevates the flavors, making every bite irresistible. It takes just a few simple ingredients and a short amount of time to create these delightful treats at home. I was amazed at how easily I could replicate a classic favorite while adding my personal touch. Trust me, once you try these, you’ll never go back to store-bought!
I remember the first time I made these homemade Reese’s Cups. I was craving something sweet, and instead of reaching for the store-bought version, I decided to give it a go from scratch. I was pleasantly surprised at how easy it was to make them! The secret is in melting the chocolate just right and using good quality peanut butter, which elevates the flavor.
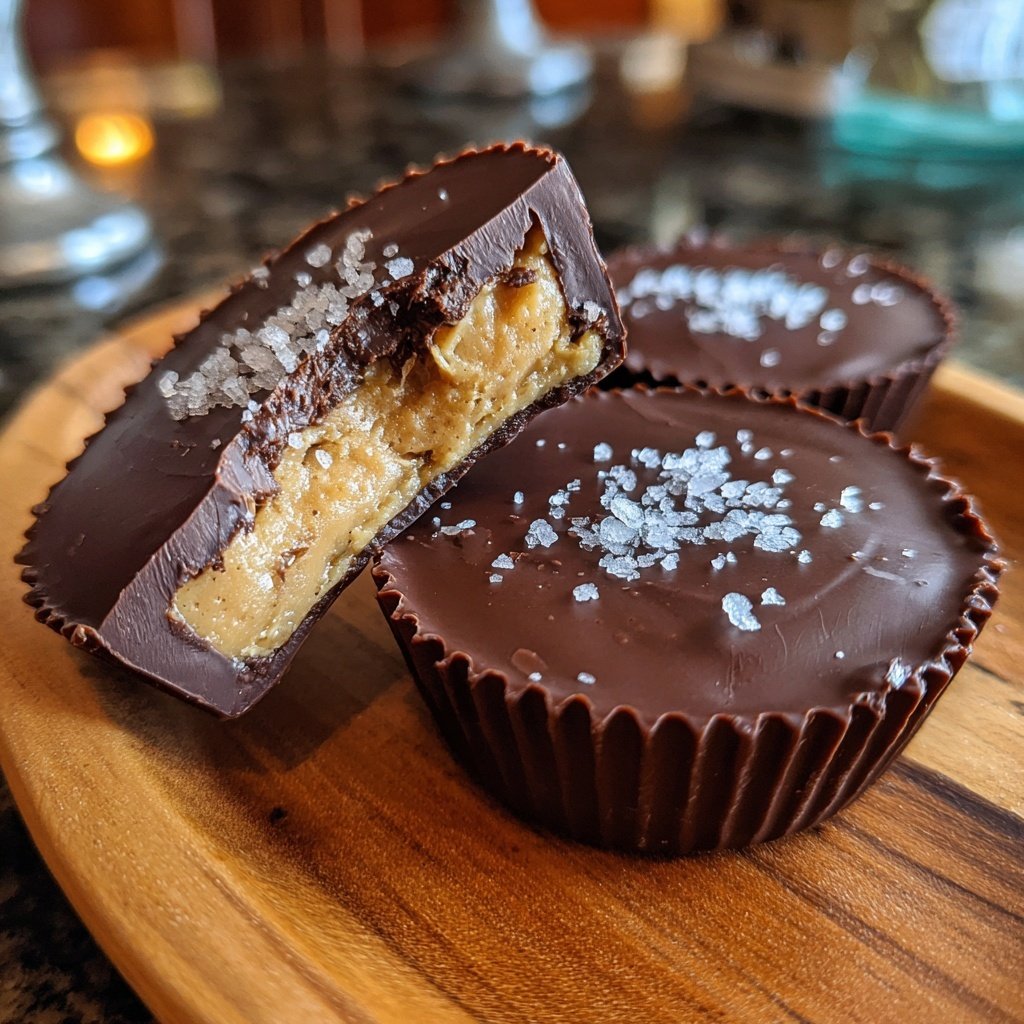
During my last attempt, I added a sprinkle of sea salt on top just before the chocolate set, and it took these cups to a whole new level! The salty-sweet combination makes them hard to resist, and I love serving them at gatherings to impress my friends.
Why You'll Love These Cups
- Perfectly balanced sweet and salty flavors
- Creamy texture with a satisfying crunch
- Easy to make and customize for any occasion
The Importance of Chocolate Type
Choosing the right type of chocolate is crucial for the balance of flavors in your Homemade Reese’s Cups. The combination of milk chocolate and semi-sweet chocolate creates a rich, complex taste that is both sweet and slightly bitter, enhancing the overall enjoyment. Using a higher cocoa percentage chocolate can yield a more intense flavor, but be cautious as it could overpower the peanut butter. Aim for quality chocolate chips that melt smoothly, ensuring a glossy finish for each cup.
If you prefer a different chocolate flavor, consider substituting dark chocolate for semi-sweet. This change will give your cups a deeper flavor profile, but be mindful of the sweetness. Adjust the powdered sugar to maintain that perfect sweetness level, as dark chocolate has a more pronounced bitterness. For a dairy-free version, look for plant-based milk chocolate alternatives available at specialty grocery stores.
Customizing the Peanut Butter Filling
The peanut butter filling is where you can add your own twist to the recipe. For an added crunch, mix in chopped nuts like peanuts or almonds, or even add some crushed graham crackers for a s'mores-like experience. If you’re in the mood for a little spice, consider incorporating a dash of cinnamon or a pinch of cayenne pepper to the filling; this contrast can elevate the flavor and add an unexpected kick.
If you’re looking for a healthier version, opt for natural peanut butter without added sugar. This can change the texture slightly, so make sure to mix well to achieve a smooth consistency. Alternatively, nut butters like almond or cashew can also be fantastic substitutes, allowing you to experiment with different flavor profiles while keeping the recipe fun and new.
Ingredients
For the Chocolate and Peanut Butter Cups
- 1 cup milk chocolate chips
- 1 cup semi-sweet chocolate chips
- 1 cup creamy peanut butter
- 1/2 cup powdered sugar
- 1/2 teaspoon vanilla extract
- Sea salt for sprinkling
Instructions
Prepare the Cups
In a microwave-safe bowl, combine the milk and semi-sweet chocolate chips. Microwave in 30-second intervals, stirring in between, until the chocolate is fully melted and smooth. Line a muffin tin with cupcake liners for easier removal.
Create the Chocolate Layer
Spoon a tablespoon of melted chocolate into the bottom of each cup. Use a brush or the back of a spoon to spread the chocolate up the sides of the liner. Place the muffin tin in the refrigerator for 10 minutes to set.
Make the Peanut Butter Filling
In a bowl, mix the peanut butter, powdered sugar, and vanilla extract until well combined. Remove the muffin tin from the fridge and add a spoonful of the peanut butter mixture into each cup, smoothing it down slightly.
Top with Chocolate
Pour the remaining melted chocolate over the peanut butter filling in each cup, ensuring it is fully covered. Sprinkle a small pinch of sea salt on top of each chocolate layer.
Set and Serve
Return the muffin tin to the refrigerator for about 15 minutes, or until fully set. Carefully peel the liners away from the cups. Enjoy your homemade Reese’s Cups!
Professionele Tips
- For an extra touch, try using dark chocolate instead of milk chocolate or add crushed nuts into the peanut butter filling for a delightful crunch.
Storage Tips
Storing your Homemade Reese’s Cups properly will help maintain their freshness and texture. After they have fully set, you can keep them in an airtight container in the refrigerator for up to two weeks. This chilling will ensure that they remain firm and deliciously chewy. For longer storage, consider freezing them. Just make sure to separate the cups with parchment paper before placing them in a freezer-safe container; this prevents them from sticking together.
When you want to enjoy them from the freezer, remove the desired amount and let them sit at room temperature for about 10-15 minutes. This will allow them to soften slightly, enhancing the creamy peanut butter texture. Avoid refreezing them multiple times, as this can alter their texture dramatically.
Serving Suggestions
While these Homemade Reese’s Cups are delightful on their own, serving them in a dessert platter can elevate any gathering. Pair them with fresh fruit like strawberries or bananas to introduce a refreshing contrast to their richness. A drizzle of caramel or melted chocolate over the tops can make them look even more indulgent, particularly for special occasions.
You might also consider pairing these cups with a glass of cold milk or even a scoop of vanilla ice cream for a delightful dessert experience. When serving, try slicing them in half to reveal the layers; the visual appeal will entice anyone to grab one. These little touches not only make your dessert more appealing but also enhance the overall tasting experience.
Vragen Over Recepten
→ Can I use crunchy peanut butter for this recipe?
Yes! Crunchy peanut butter will add a nice texture to the cups.
→ How do I store the leftover cups?
Store them in an airtight container in the refrigerator for up to two weeks.
→ Can I freeze these Reese’s Cups?
Absolutely! You can freeze them in a single layer and then transfer to a freezer-safe bag for up to three months.
→ What type of chocolate works best?
Using a mix of milk and semi-sweet chocolate gives a nice balance, but feel free to use your favorite type!
Homemade Reese’s Cups with Sea Salt
Gemaakt door: Dahlia Kensington
Recepttype: Zoete Baksels
Vaardigheidsniveau: Beginner
Eindportie: 12.0
Wat je Nodig Hebt
For the Chocolate and Peanut Butter Cups
- 1 cup milk chocolate chips
- 1 cup semi-sweet chocolate chips
- 1 cup creamy peanut butter
- 1/2 cup powdered sugar
- 1/2 teaspoon vanilla extract
- Sea salt for sprinkling
Stappen
In a microwave-safe bowl, combine the milk and semi-sweet chocolate chips. Microwave in 30-second intervals, stirring in between, until the chocolate is fully melted and smooth. Line a muffin tin with cupcake liners for easier removal.
Spoon a tablespoon of melted chocolate into the bottom of each cup. Use a brush or the back of a spoon to spread the chocolate up the sides of the liner. Place the muffin tin in the refrigerator for 10 minutes to set.
In a bowl, mix the peanut butter, powdered sugar, and vanilla extract until well combined. Remove the muffin tin from the fridge and add a spoonful of the peanut butter mixture into each cup, smoothing it down slightly.
Pour the remaining melted chocolate over the peanut butter filling in each cup, ensuring it is fully covered. Sprinkle a small pinch of sea salt on top of each chocolate layer.
Return the muffin tin to the refrigerator for about 15 minutes, or until fully set. Carefully peel the liners away from the cups. Enjoy your homemade Reese’s Cups!
Extra Tips
- For an extra touch, try using dark chocolate instead of milk chocolate or add crushed nuts into the peanut butter filling for a delightful crunch.
Voedingswaarde (Per Portie)
- Calories: 180 kcal
- Total Fat: 12g
- Saturated Fat: 5g
- Cholesterol: 5mg
- Sodium: 50mg
- Total Carbohydrates: 15g
- Dietary Fiber: 1g
- Sugars: 8g
- Protein: 4g